The Box Model
The CSS box model is a fundamental concept in web design. It defines the layout and spacing of all elements on a web page. Every element in CSS, including text, images, and buttons, is essentially a box.
Imagine each element on a web page as a box nested within another. Each element has its own box with content, padding, border, and margin. This nested structure allows for precise control over the layout and spacing of elements.

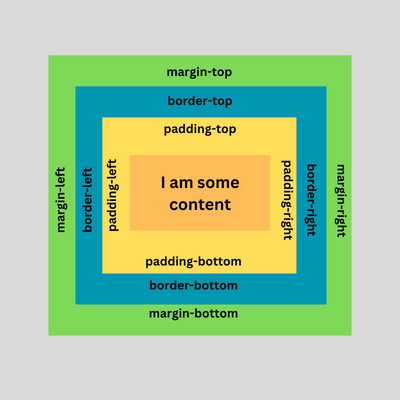
This is the visualization of the Box Model.
-
Content:
- This is the innermost blue rectangle representing some dimension.
- It is the actual content of the box, such as text, images, or other media.
- Currently, this blue rectangle represents the width and height of your browser window
- It is surrounded by the padding.
-
Padding:
- It is the space between the content and the border.
- It helps control the amount of space between the content and the border of the box.
- Can be set using properties like
padding-top,padding-right,padding-bottom, andpadding-left.
-
Border:
- A line that surrounds the padding (and content).
- It separates the padding from the margin.
- Can be styled using properties like
border-width,border-style, andborder-color.
-
Margin:
- The space between the border of the box and other neighboring elements.
- It helps control the spacing between elements on a web page.
- Can be set using properties like
margin-top,margin-right,margin-bottom, andmargin-left.
When you set the width and height of an element using CSS, you are defining the dimensions of the content area. The total size of the element, including padding, border, and margin, is calculated by adding these values to the width and height.
Suppose you have <p> I am some content </p>, then you’d draw its box model like this:

How to use the box model in WebbsAI:
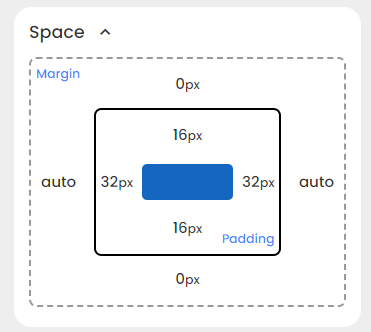
The functionality for the box model is spread throughout the Styles panel in WebbsAI. To adjust your padding and margin, select an element and go to Styles > Space.

The blue rectangle represents your content.
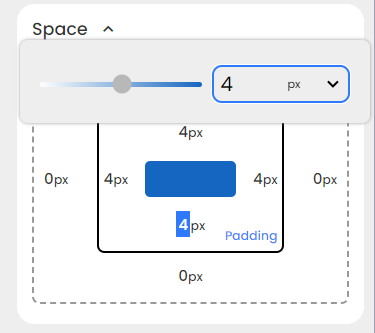
You can click on any of the values around the box and adjust it according to your convenience by typing in another value or simply moving the slider back and forth.

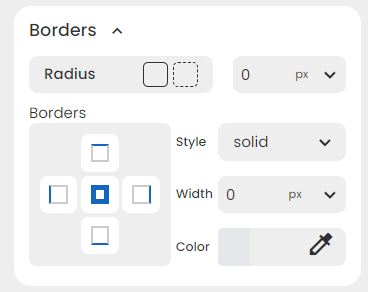
To adjust the borders of that element, go to Styles > Borders

All the general properties for borders can be modified in this section.
CSS Syntax:
Padding
Syntax:
padding: [value] [unit];To set a more precise value:
padding-top: [value] [unit];
padding-bottom: [value] [unit];
padding-right: [value] [unit];
padding-left: [value] [unit];
Example:
selector {
	padding: 10 px;
}
Margin
Syntax:
margin: [value] [unit];To set a more precise value:
margin-top: [value] [unit];
margin-bottom: [value] [unit];
margin-right: [value] [unit];
margin-left: [value] [unit];Example:
selector {
	margin: 1.5 em;
}
Border
Syntax:
border: [border-width] [border-style] [border-color];Example:
selector {
	border: 2 px solid green;
}
Conclusion
By understanding and utilizing the box model through simple tools provided by WebbsAI, you can control the layout and spacing of elements on your website, and go on to create a more professional and visually appealing user experience for your customers.