Mastering HTML Intermediate and Advanced
In this lesson, we’ll explore intermediate and advanced HTML techniques that allow you to create more complex and interactive web pages.
Categories of HTML Tags
To explain the use of tags at appropriate times more clearly, we have categorized them for you. In this manner, it is easier to comprehend which tag should be used when and how.
Semantic Tags
These tags provide meaning and structure to the content within a webpage. Not only do they make the content more understandable for both humans and search engines, but they also improve accessibility and Search Engine Optimisation (SEO). Outlined are some common semantic HTML tags:
-
<header>: This tag acts as a container for introductory content or site branding. It can include elements like navigation elements (e.g. menus and links), site logo, and any other content required for navigation. -
<nav>: This tag defines a section of a webpage that contains navigation links that allow users to navigate to different parts of a website or external resources. It often contains an unordered list (<ul>) or an ordered list (<ol>) of links. -
<section>: To define a section of content within a webpage, we often use this tag. The content is divided into meaningful divisions, making the page more structured and understandable. An example can be a section of testimonials and another section of sponsors on the landing page of a site. -
<footer>: This tag contains footer information, often including copyright and contact details.
One form of arrangement for the semantic tags can be shown visually as follows:

It is integral to note here that the navigation menu acts as a sidebar in this case. There is also a main tag that acts like a body to group all the section tags.
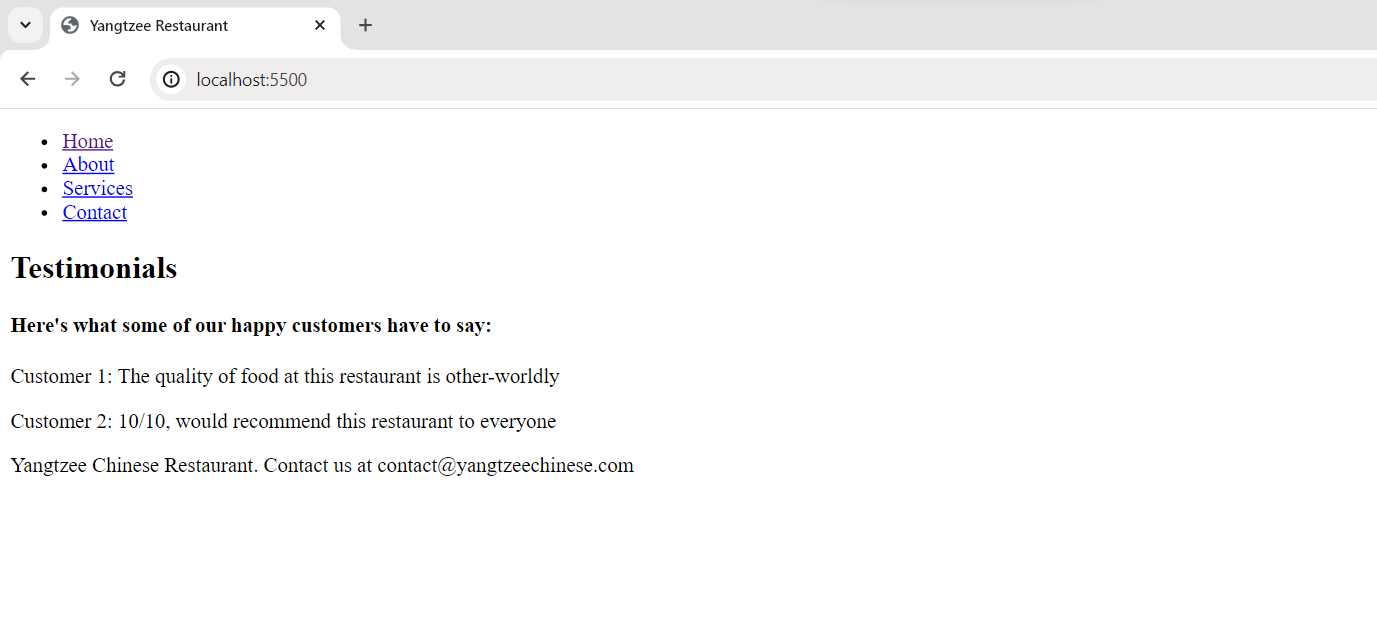
Scenario: You are a web developer tasked with making a site for a Chinese Restaurant named Yangtzee Chinese Restaurant. By making use of the semantic tags learned above and the assistance of the previous lesson, create a basic webpage that follows the requirements below: — A navigation bar that leads to four different pages: Home, Services, About, and Contact. — A section that contains text-based testimonials of happy customers. —A footer that displays the company’s contact information and name.
You should be able to display something like this:
Answer: Once you are finished with your attempt, match your answer with the one provided below (You only need to compare if it is similar and used correctly):
<!doctype html>
<html>
	<head>
		<title>Meet My Cat - Whiskers</title>
	</head>
	<body>
		<h1>About My Cat - Whiskers</h1>
		<p>
			Meet Whiskers, my adorable pet cat. He's a fluffy and playful feline
			companion.
		</p>
		<h2>More About Whiskers</h2>
		<p>
			Whiskers enjoys lounging in the sun, chasing toy mice, and taking
			long naps. He's also an expert at purring.
		</p>
		<h2>See Whiskers in Action</h2>
		<ul>
			<li>Playing with a ball of yarn</li>
			<li>Basking in the sunlight</li>
			<li>Cuddling with his favorite toy</li>
		</ul>
		<h2>Connect with Whiskers</h2>
		<p>
			For more adorable cat moments, you can visit Whiskers on his
			<a href="https://www.whiskerscat.com">website</a>.
		</p>
		<p>Thank you for learning about Whiskers!</p>
	</body>
</html>
You’ll start to notice that while we have used correct partitioning tags for each part of the page, it does not show visibly. This is because HTML is only used to define structure! In the next lessons, we can design this page using CSS to make it look more like the webpages of today.
Don’t worry if you didn’t get it on the first try. This is what practicing is all about!
Text Formatting Tags
As mentioned in the previous lesson as well, these tags are used to change the appearance or style of text within a webpage.
-
<p>: It defines paragraphs. -
<h1>,<h2>,<h3>,<h4>,<h5>,<h6>: It create headings of different levels. -
<strong>: It represents a strong important text. -
<em>: It emphasizes text. -
<b>: It bolds text. -
<i>: It italicizes text. -
<u>: It underlines text.
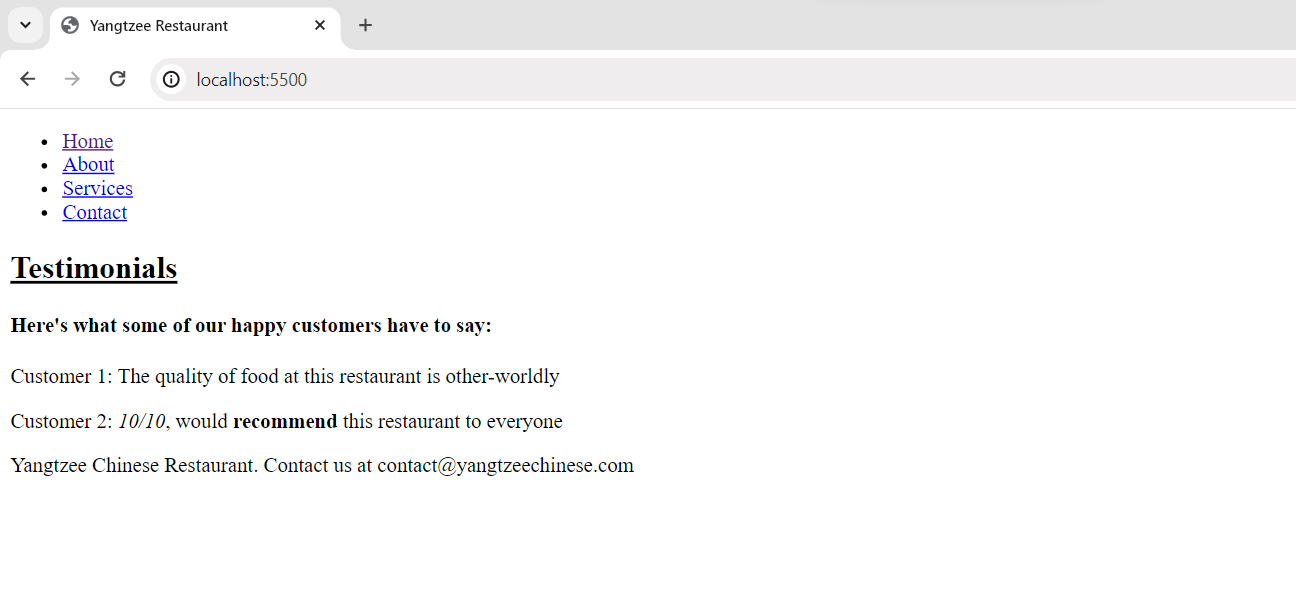
Scenario: Build on the Scenario provided to you above, and make the following changes to the testimonials section:
- Bold all occurrences of the word ‘recommend’ in Testimonials.
- If there is any rating provided, emphasize it.
- Underline all headings present.
This is how it should look:
Answer:
<!doctype html>
<html>
	<head>
		<title>Yangtzee Restaurant</title>
	</head>
	<body>
		<header>
			<nav>
				<ul>
					<li><a href="/">Home</a></li>
					<li><a href="/about">About</a></li>
					<li><a href="/services">Services</a></li>
					<li><a href="/contact">Contact</a></li>
				</ul>
			</nav>
		</header>
		<section>
			<h2><u>Testimonials</u></h2>
			<h4>Here's what some of our happy customers have to say:</h4>
			<p>
				Customer 1: The quality of food at this restaurant is
				other-worldly
			</p>
			<p>
				Customer 2: <em>10/10</em>, would <b>recommend</b> this
				restaurant to everyone
			</p>
		</section>
		<footer>
			<p>
				Yangtzee Chinese Restaurant. Contact us at
				contact@yangtzeechinese.com
			</p>
		</footer>
	</body>
</html>
List Tags
These tags do not require much elaboration as they’ve been studied previously as well. They are used to create a list of items, unordered or ordered.
-
<ul>: It defines an unordered (bulleted) list. -
<ol>: It defines an ordered (numbered) list. -
<li>: It represents list items within<ul>and<ol>.
Link Tags
Link tags are essential for including external resources and specifying how they should be used on a web page.
-
<a>: It creates hyperlinks to other web pages or resources. Its attribute ‘href’ contains the address of the destination URL. -
<link>: It defines relationships between the current document and external resources like stylesheets and icons.
Media Tags
-
<img>: It is used to insert images into a webpage. Its attribute ‘src’ contains the source URL of the image. The image tag is used as follows:<img src="image1.jpg" alt="Image 1">The ‘alt’ attribute is the fallback text which is displayed when the image does not load for some reason. It allows users to understand the context of the image in that situation.
There are other tags for media like
<iframe>,<audio>, and<video>, but<img>is the most frequently used out of all of them.
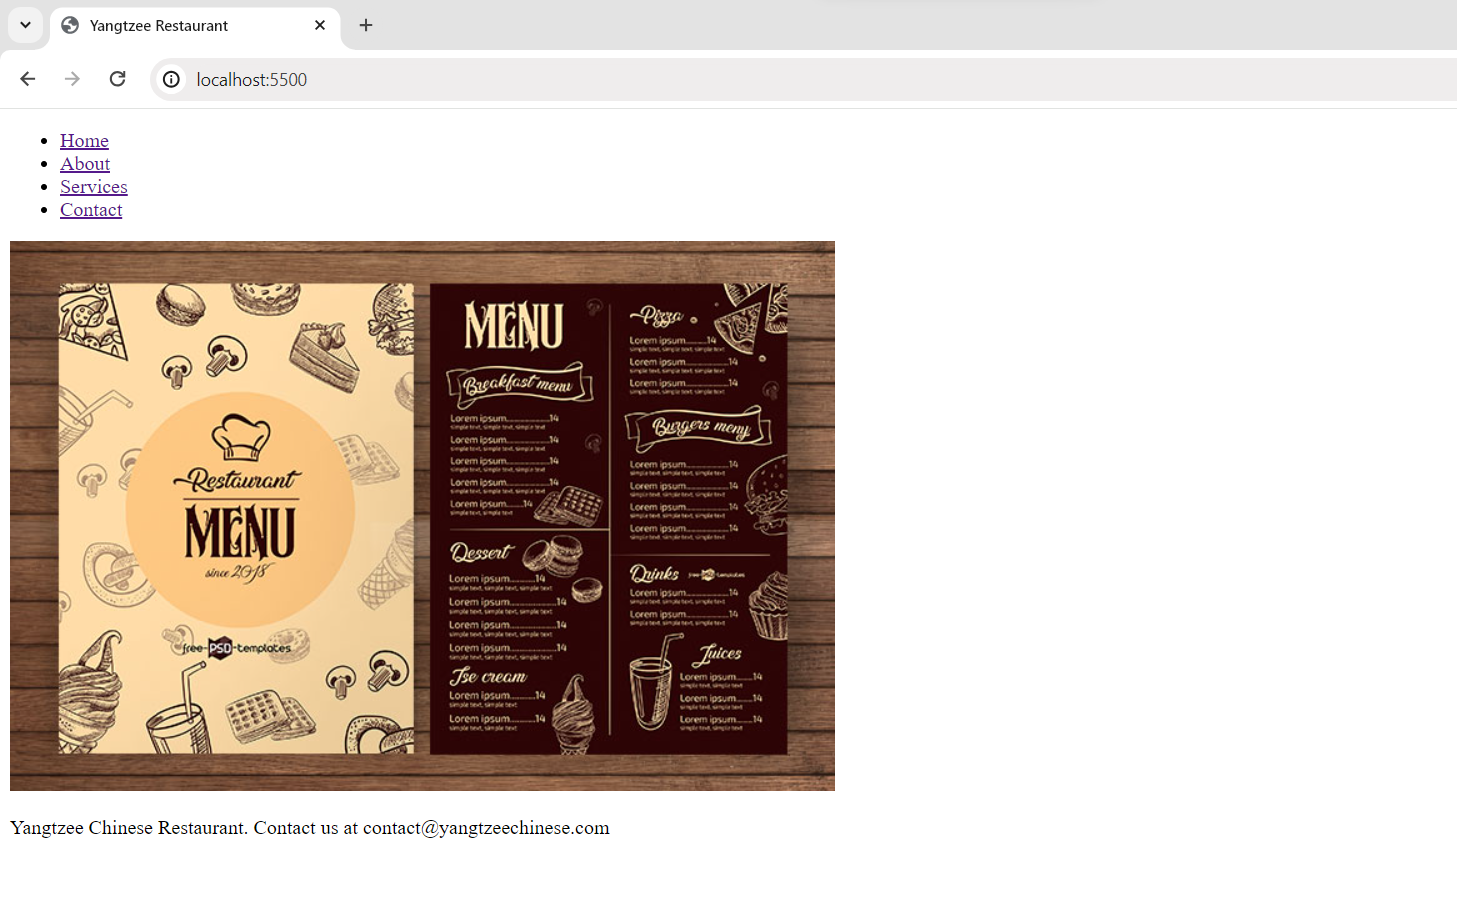
Scenario: For the Services page of my Yangtzee Restaurant, I want to display an image of our Menu. Consider that the relevant image is already present in your project and has the source URL of ‘menu.png’. How would you add the code such that the image is placed clearly on the Services page?
Answer:
<!doctype html>
<html>
	<head>
		<title>Yangtzee Restaurant</title>
	</head>
	<body>
		<header>
			<nav>
				<ul>
					<li><a href="/">Home</a></li>
					<li><a href="/about">About</a></li>
					<li><a href="/services">Services</a></li>
					<li><a href="/contact">Contact</a></li>
				</ul>
			</nav>
		</header>
		<img src="menu.png" alt="Menu" />
		<footer>
			<p>
				Yangtzee Chinese Restaurant. Contact us at
				contact@yangtzeechinese.com
			</p>
		</footer>
	</body>
</html>
NOTE: The header and footer codes are kept on this page because they do not change or disappear on any page of a website.
Form Tags
This is an important category of tags responsible for dealing with input from the user, making selections, and submitting data to the web server for further processing. They are behind most of the interactivity of websites and are used for login, registration, contact, search, and many more pages like this.
-
<form>: It acts as a container for all form elements. We use this tag to denote where the form starts and where it ends. In the attributes of the form tag, we specify ‘action’ which tells us where the form data will be sent for processing, and ‘method’, which defines the HTTP method for submitting form data (contains ‘GET’ or ‘POST’) -
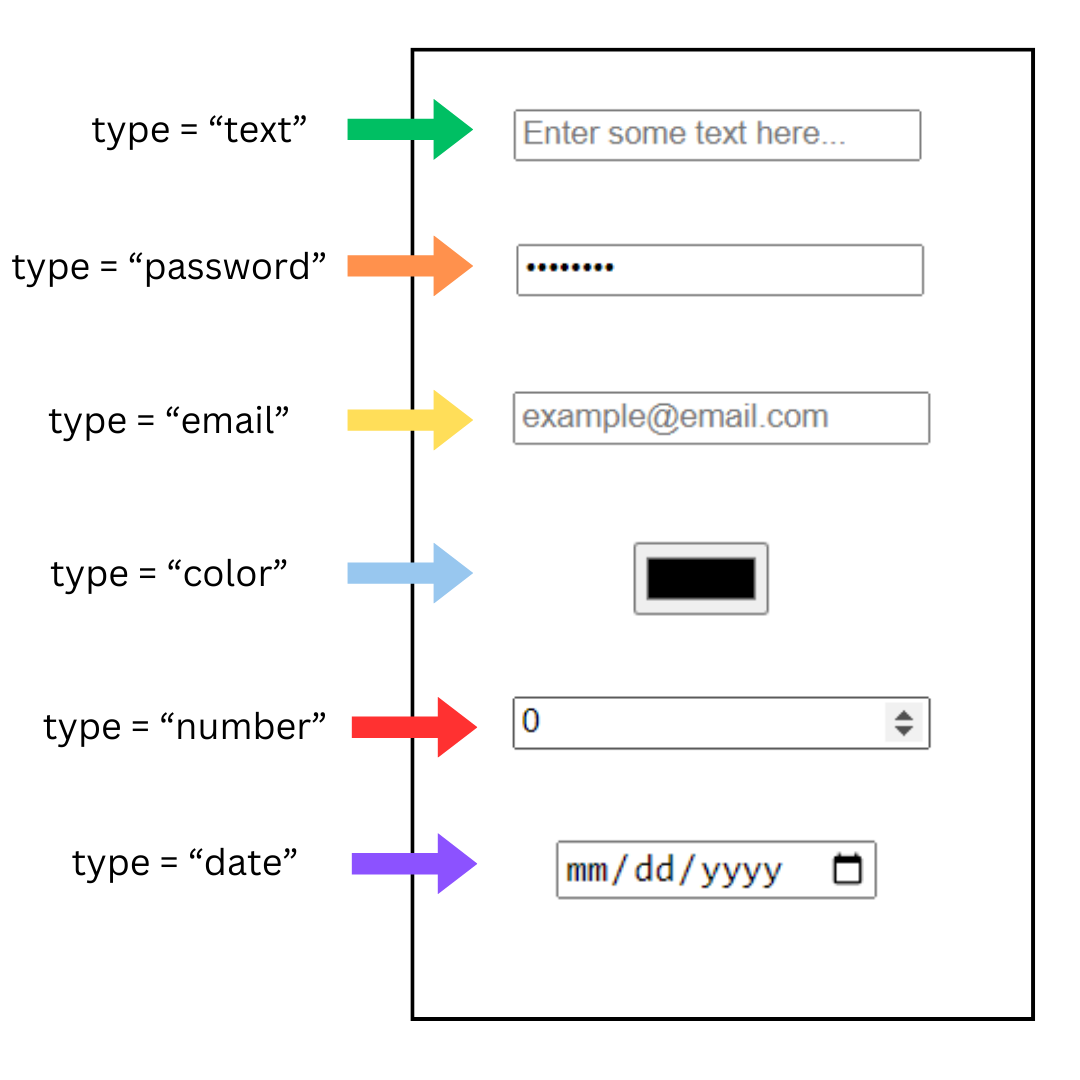
<input>: This tag represents various form controls like text fields, checkboxes, radio buttons, etc which are specified in the attribute ‘type’. It has the following format as:<input type="text" />This will create a small textbox for the user to write in. We use this kind of input field for names. If email is to be specified, the type value simply changes to ‘email’.
Some examples are provided below:
-
<textarea>: This tag creates a multi-line text input area for entering longer texts or comments. -
<button>: This tag is used to create a clickable button on a webpage. We can use it to submit a form, move to another page, or do any custom behaviour. -
<label>: It is text that is associated with all input elements. They help describe the purpose of an input field. It is used in the following manner:<label for="name">Your Name:</label> <input type="text" id="name" />
The text field input will now have a label of ‘Your Name:’
One important thing to note is that for the label to target the correct input field, it must contain the id of that input field in its ‘for’ attribute. Id’s will be explained later in our CSS chapter but for now, keep this simple rule in mind.
Scenario: The Yangtzee Chinese Restaurant wants to develop its Contact page. It should include:
- A heading that tells the user to submit any query they might have to their restaurant.
- A text field that asks for the user’s name.
- An input field that asks for the user’s email address.
- A text area that allows the user to submit any query or message they might have.
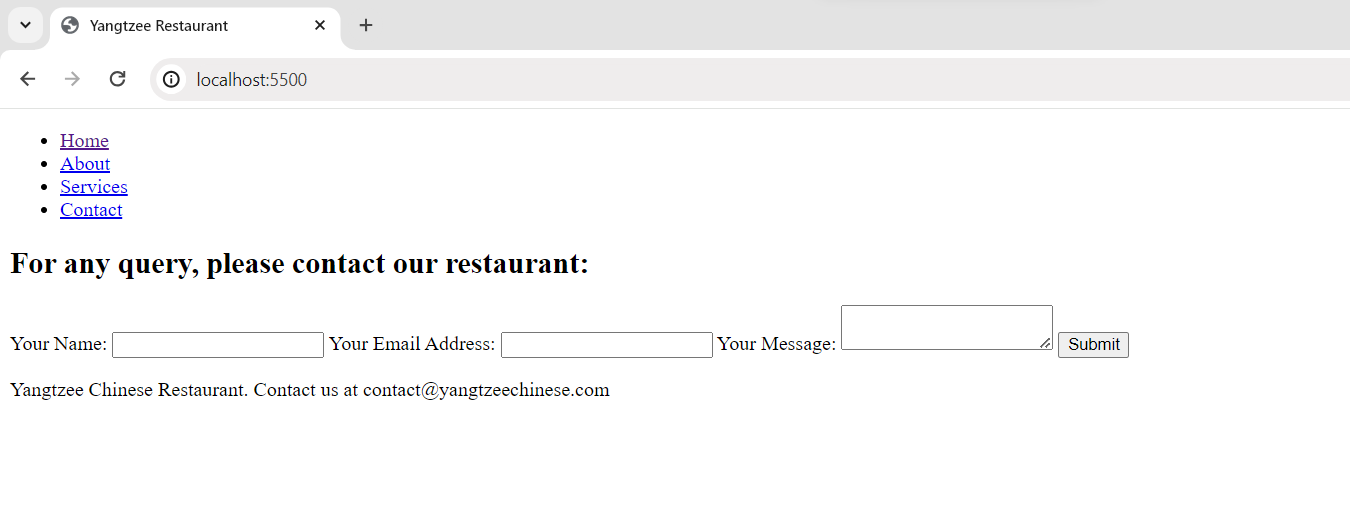
Answer:
<!doctype html>
<html>
	<head>
		<title>Yangtzee Restaurant</title>
	</head>
	<body>
		<header>
			<nav>
				<ul>
					<li><a href="/">Home</a></li>
					<li><a href="/about">About</a></li>
					<li><a href="/services">Services</a></li>
					<li><a href="/contact">Contact</a></li>
				</ul>
			</nav>
		</header>
		<h2>For any query, please contact our restaurant:</h2>
		<form action="submit_query.php" method="post">
			<label for="name">Your Name:</label>
			<input type="text" id="name" />
			<label for="email">Your Email Address:</label>
			<input type="email" id="email" />
			<label for="message">Your Message:</label>
			<textarea id="message"></textarea>
			<input type="submit" value="Submit" />
		</form>
		<footer>
			<p>
				Yangtzee Chinese Restaurant. Contact us at
				contact@yangtzeechinese.com
			</p>
		</footer>
	</body>
</html>
Table Tags
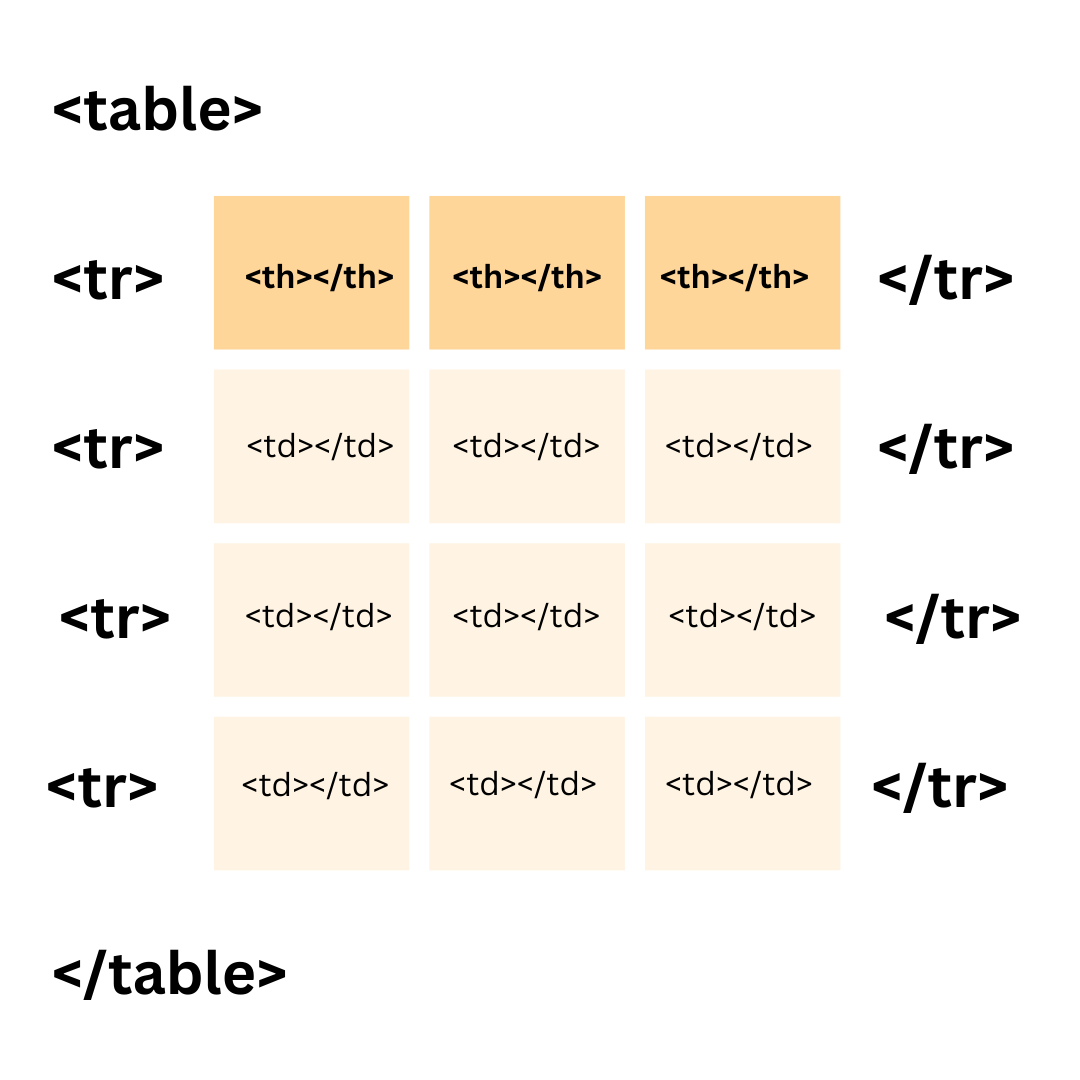
Oftentimes, we need to represent data in tabular format to record information cleanly and concisely. For this purpose, this category of tags allows you to represent tabular data structures in rows and columns.
-
<table>: It acts as the main container for the entire table. It tells us where the table begins and where it ends. -
<tr>: This tag is used to represent a row in the table. Each row can contain one or more cells. -
<td>: This tag is responsible for representing table cells. It contains your data within the table row. -
<th>: This tag represents a table cell as well with the difference of being displayed in bold and being centered by default.
This is how the tags structure themselves:
Scenario: The Restaurant changes its requirements and instead of having its Menu shown as an image, it wants it shown as a table on their Services page. They have requested the following changes:
- Three headings: Item Name, Item Price, Discount Price.
- Two rows in the table containing the following dish information: Kung Pao Chicken, 1200 Rs, 100 Rs Fried Rice, 950 Rs, 60 Rs
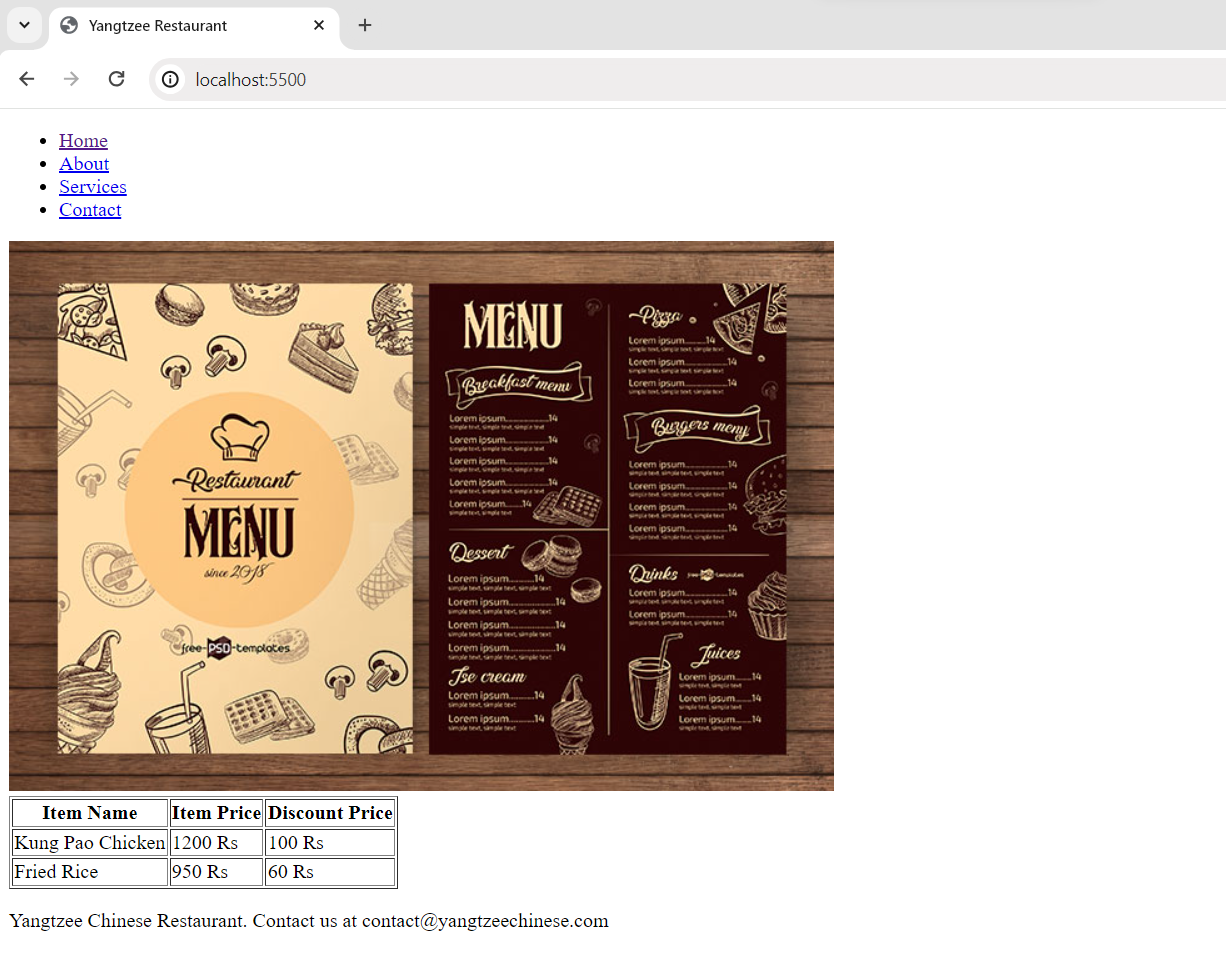
Answer:
<!doctype html>
<html>
	<head>
		<title>Yangtzee Restaurant</title>
	</head>
	<body>
		<header>
			<nav>
				<ul>
					<li><a href="/">Home</a></li>
					<li><a href="/about">About</a></li>
					<li><a href="/services">Services</a></li>
					<li><a href="/contact">Contact</a></li>
				</ul>
			</nav>
		</header>
		<img src="menu.png" alt="Menu" />
		<table border="1">
			<tr>
				<th>Item Name</th>
				<th>Item Price</th>
				<th>Discount Price</th>
			</tr>
			<tr>
				<td>Kung Pao Chicken</td>
				<td>1200 Rs</td>
				<td>100 Rs</td>
			</tr>
			<tr>
				<td>Fried Rice</td>
				<td>950 Rs</td>
				<td>60 Rs</td>
			</tr>
		</table>
		<footer>
			<p>
				Yangtzee Chinese Restaurant. Contact us at
				contact@yangtzeechinese.com
			</p>
		</footer>
	</body>
</html>
NOTE: The ‘border’ attribute of the table tag is obsolete in HTML5 but it is used only to represent a table clearly without the use of CSS.
Conclusion
With the wrap of this lesson, we’ve fully mastered the fundamentals of HTML by covering the most important concepts and tags. You’ll now be able to develop a simple website structure simply by recalling everything you’ve learned. Keep experimenting, keep coding, and keep pushing the boundaries of what’s possible on the web!